The first step to working with VIP Bookers is obviously creating a VIP Booker
After reading this article you will know how to create a VIP Booker
Let's get you started
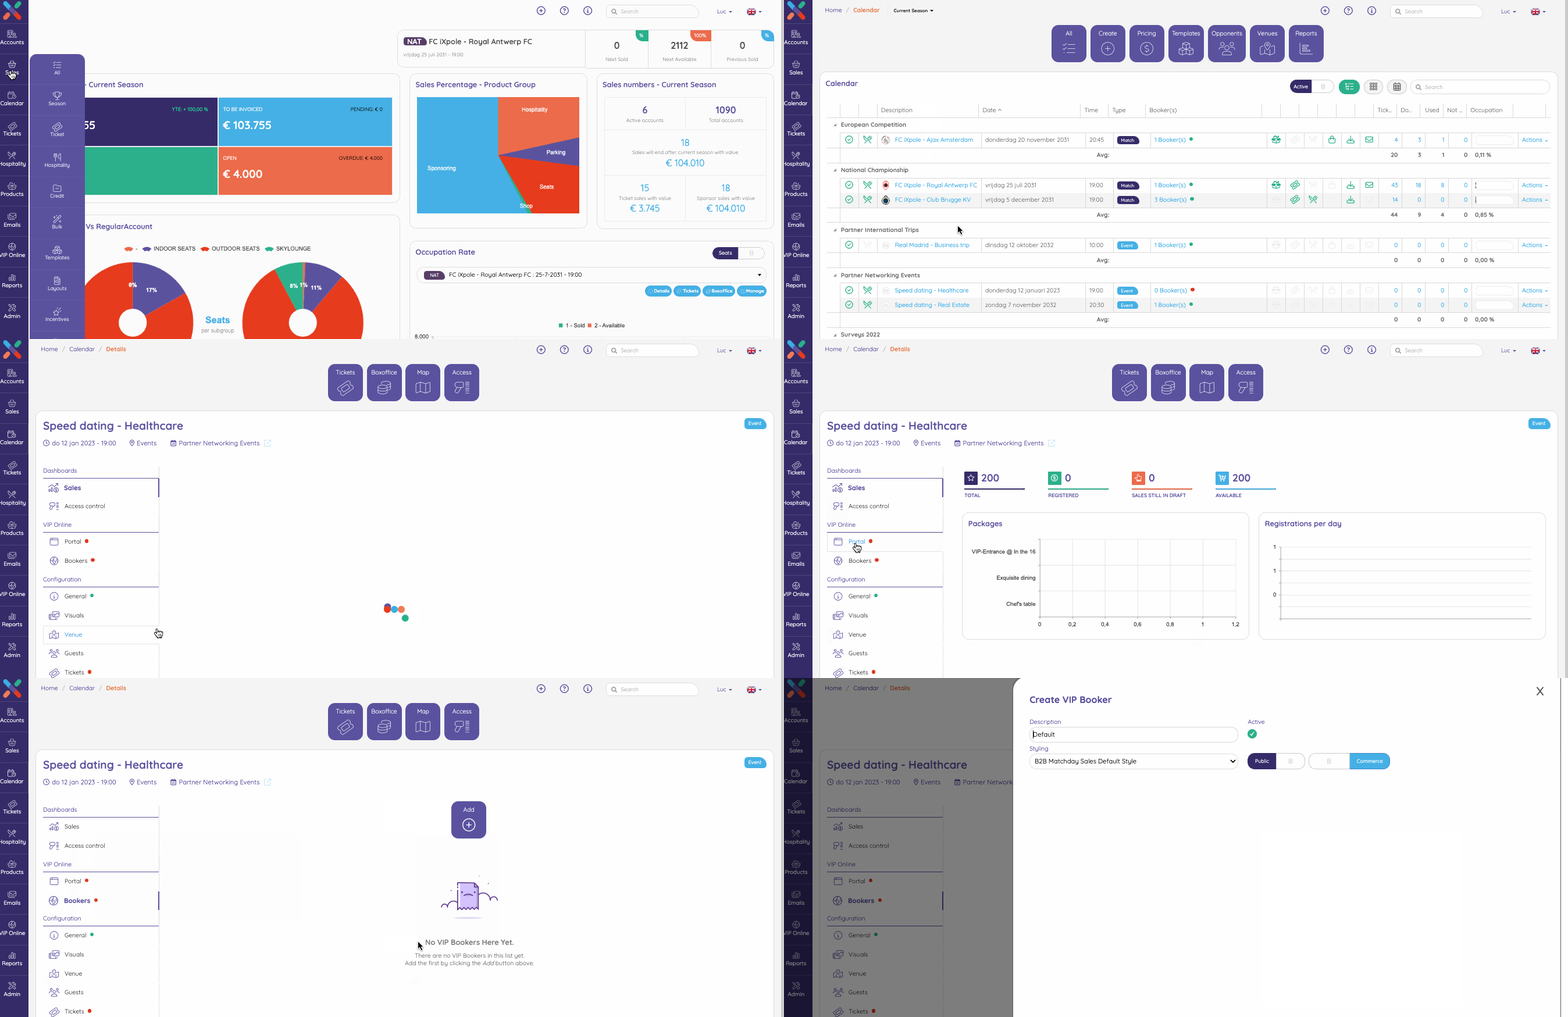
To create a VIP Booker for a Calendar Item, go to
Calendar, next click on the Calendar Item you want to create a VIP Booker for. On the Calendar Item details page, click on Bookers (under the VIP Online heading). A list with all VIP Bookers for this Calendar Item will appear. If no VIP Bookers exist for this Calendar Item, the view will be empty.To create your VIP Booker for this Calendar Item click on the shortcut
Add on top of the page.
In the next step, a VIP Booker creation window will open.
Fill in the name you want to give to the VIP Booker in the
Description field.Select a Styling you want to use for this VIP Booker.

Next you can choose to have the VIP Booker behave as
- a private or public VIP Booker
- a commerce or a registration VIP Booker
Don't forget to check theActiveCheckbox if you want this VIP Booker to be active
To confirm your settings, click on the
Save button in the right bottom of the window